Adventures in Literacy Land: Comprehension Skills

Showing posts with label Comprehension Skills. Show all posts

Linking Student Learning with Genre Connections

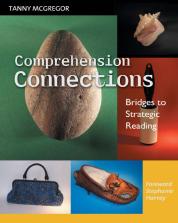
Comprehension Connections and Genre Connections by Tanny McGregor are two books every teacher needs to purchase, read, and keep for reference later.  Both of these books are filled with lesson ideas to help your students become active thinkers in the reading process. Many kids just scratch the surface as they read often missing the subtleties that authors weave into their texts.

Today's post by Carla at Comprehension Connection will explain how these books can be used and add spark to your teaching and your students' learning experience. Read on to get more information...

Connecting learning to real life experiences helps it stick. Check out this post for concrete ways to help your children with informational text.

When Adventures in Literacy Land kicked off, my co-bloggers, Emily at Curious Firsties and Andrea from Reading Toward the Stars, wrote up posts related to Tanny McGregor's book, Comprehension Connections.  They talked about lesson ideas they'd used from her book.  I loved them, and decided I had to have my own copy of the book.  I am really glad to have discovered it as Tanny's hands-on approach and higher level thinking skills help students who need just a little more in depth explanation of skills get what they need.  

The premise with Tanny's lessons is to take a big concept and introduce it with concrete objects. By using concrete objects, students have a visual image to attach to their learning. Simple things like a glass jar, a magnifying glass, or a broken necklace chain can inspire thinking as students try to figure out how they relate to the lesson.

Another important concept from Comprehension Connections is using a launching sequence similar to the gradual release model.  The added benefit of the launching sequence is that it includes the use of various sensory stimuli such as music, wordless picture books, and art to scaffold the important points of the lesson and to reach those learners who prefer a hands-on approach. I particularly love Tanny’s ideas because we need our students to think critically about their reading, and as the launching sequence is implemented, students analyze, question, and connect.  

In Comprehension Connections, the chapters each focus on a different comprehension skill. This is very helpful as teachers can quickly skim each chapter for a quick idea or to spark one of their own.  Certainly, all of the ideas can be applied to different books and learning levels, and in fact, we know multiple opportunities for students to practice a skill is essential for students to transfer that learning into independent practice. Therefore, multiple lessons are required for mastery.

Now, before I transition to Genre Connections, I have a question for our readers.  

Genre Connections: Lessons to Launch Literary and Nonfiction TextsI find that my students (who are typically below level) grab onto key words or bits of a concept and want to apply it to the wrong genre or every genre.  For example, I may work with my students on plot development, and several days later as new guided reading books of a different genre are introduced, they may not connect that different comprehension skills may be required to grasp the big ideas of the book well. This is why I think using the ideas shared in Genre Connections may provide my students with a firmer understanding of when to use comprehension skills we've learned.


Like the launching sequence in Comprehension Connections, students begin these lessons with a concrete object.  The concrete objects are chosen to help the student realize purpose for the learning and categorize information to more firmly differentiate genres. Tanny calls this process, “Noticing and Naming the Genre.” She uses simple objects that are readily available such as clothespins, prisms (in your science kits), mirrors, and one of my favorites, seed packets. 

In the section about informational text, she uses seed packets to get students to notice information we can learn from small bits of text if we're observant. Just look for a minute at this image and think about all the information you can gather...price, what vegetable will look like, name of the produce, how and when to plant it (notice the headings), who produced the seeds, and even the year the seeds were made for. We need our students to read informational text like a gardener reads seed packets.  We need them to realize that informational text includes certain features not found in other genres.  
The launching sequence then moves on to the sensory exercises.  With informational text, you might include a Schoolhouse Rocks video from Youtube like this one about electricity and discuss how informational text is organized.
Another option is to use artwork that explains such as the examples in this Prezi file.
Once students have explored various sensory media and inferred how we read informational text and what features we expect to find, then an anchor chart similar to this one would provide students with the opportunity to think how reading the seed packet relates to future reading of informational text. I also loved [this handout] from Dana Herzog which would be very helpful for interactive notebooks or future mini lessons.

Now, it's your turn.  What concrete objects would you choose to launch genre studies or improve reading comprehension?

Please share what's worked well for you.


4

Predictions Made Easy

Hello, everyone!  It's Andrea from Reading Toward the Stars to share an easy and fun way to help with comprehension at all grade levels!


Before I was a reading specialist, I spent 14 years teaching third and fourth graders.  I love teaching that age because they are really ready to learn and seem to soak it all in!  But, I know that many students struggle with reading comprehension.  Many times it is not an easy fix, but I spend all year with this one strategy to help my students.  And I still use it with my intervention groups.

Since I have worked with students in grades K-4 this year, I thought this would be great for my second and third grade students who really struggle with comprehension.  I used it with them with great success.  What is it?  Prediction!  I just teach the students to Stop, Think, Predict, which is a type of Directed Listening Thinking Activity (DLTA) or a Directed Reading Thinking Activity (DRTA)!  Here is how it works.

I chose a fun book to read that I hoped no one had read before.  The first book I read was a super easy and silly book Bark, George(Amazon affiliate link will take you to the books in this post.)

In the book, George does everything but bark for his mother until she takes them to the vet.  The book is perfect for predicting because the students have to think about what might happen next.  It is quick and easy, but the kids loved it!  This will even be perfect for kindergarten students!

After talking about the book and how we used predicting, I showed them another book Soccer Mom from Outer Space. In the book, Lena's father tells her about how his mother dressed like a pickle to cheer on his team, the Atomic Pickles.  He told her that he was embarrassed, so she went to a game without her costume.  What happened next, I will let you find out!
We spent some time just looking at the cover and predicting together, all along talking about how the kids feel when playing sports.  Then I handed out a chart with four boxes for the students to stop at certain points to make predictions while I read the book.  I asked them to stop and make a prediction about what might happen next, not at the end of the book.  Here is an example.  {Ignore the misspellings from my wonderful struggling reader and speller.}
I loved hearing some of the predictions they made.  Some of them were really close too!  So fun!

I thought this would also be great for a literacy center.  I made some bookmarks that can be placed throughout a book for students to read and then write their predictions on the predictions chart.  I actually handed the bookmarks out to my students to use while they read to help them remember to Stop, Think, Predict! Click {here} or on the picture below to grab it for free!

I love using various read-alouds and then releasing it to the students through guided reading and then into independent reading, especially with struggling readers.  This helps to scaffold their learning, leading to independence in reading and predicting.  With that independence, they will become lifelong readers!

So, what do you do to help students with predicting while they read?


http://readingtowardthestars.com

Classroom Freebies Manic Monday
1

Anchoring Our Learning


Hello Readers!  It's Carla from Comprehension Connection here with you today to share a little information on one of our favorite teaching tools, Anchor Charts.  Many of us use them, but it is important to know what our literacy leaders recommend as best practices with using them.
  
Anchor Charts have become a staple in many classrooms, and their use helps increase student engagement, provide visual cues/aids for instruction, serve as evidence of learning, and give students a frame for the learning during the lesson and after. 

The term anchor chart came about as these charts hold learning firmly in place. Just think about the purpose of an anchor for a moment. Without an anchor, boats move freely making it difficult to stay in one place. Like the anchor of a boat, anchor charts focus students on the important concepts of a lesson and keep it grounded. 

This post explains the importance of anchor charts in teaching. It includes the characteristics of great charts as well as chart ideas.

Not all anchor charts are equal though.  Sure it's convenient to make charts ahead of time, but according to Wendy Seger at Cornerstone Literacy, anchor charts need the following features to be the most effective for students.


First of all, the chart needs to focus on just one key point of a lesson.  If your objective is broad, narrow the focus of the anchor chart in order to provide a concrete model for your students.  If you have too many concepts on the chart, the student will lose focus. Break the objective down for your students to help them learn each subskill.  As skill knowledge builds, students will be equipped to fully meet the broader objective.

One goal with anchor charts is to increase student engagement and make learning come from the student.  When students generate the information for the chart, they have a vested interest in the content. The information is evidence of their learning, and by showcasing their thinking, we are reinforcing  that we value their thinking and their work. Plus, when they are displayed in the classroom, students can show them off to other school personnel, parent visitors, and their friends.


Let's face it.  We all love to have our work look polished and pretty. This may seem difficult to do when creating charts with students, but it is possible.  Teachers can certainly add borders and "pretty it up" before or after creating the chart with students.  The more important point with organizing the information though is for student learning.  By organizing the information, we are helping our students organize their thinking.  One very effective teaching strategy is Think Aloud, and when we create charts with our students, we can use this strategy AND help our students categorize the information more easily through the anchor chart.  

Just like we match our objectives to the needs of our students, our anchor charts need to fit the developmental stage of our readers too. When you think about skills such as main idea, it's important to keep the language at the level of the reader.  We should use their language to make the chart.  Using leading questions to guide the discussion will help elicit student responses you can record.  When there are misconceptions, we see it through the responses and can clarify errors. One added benefit to questioning is that it allows the kids to talk.  They are social little beings and enjoy giving their opinions for sure!

As students learn new skills, anchor charts from prior lessons can provide students with the background information and skills they need for the new content.  Many students need multiple exposures in order to master a skill. Having your anchor charts to refer to during remediation or for work stations can give students that extra reminder they may need in order to master the content.
As we know, anchor charts can be very, very helpful to students.  They can be made on chart paper or electronically, and with new applications being added all the time, students even have the ability to compose anchor charts with teammates in cooperative groups through programs like Popplet, the Notes App on the I-Pad, or for longer notes, students can use the Page App.  Anchor charts can also be photographed and kept in a photo gallery for times that students need the information, but it's hard to see or put away. For my groups, I enjoy using these printable charts for reference after we've made one as a class.

Here is my board for anchor charts on Pinterest.  I love that they stimulate discussion as the charts are made, but also provide cues for deeper thinking after. This board is always growing, so follow along if you love anchor charts too.

I don't know about you, but I am always on the look out for new and clever ways to present information to my students.  If you have favorite anchor charts you'd like to share, we'd love to see them.  Feel free to post them in your comments or share a pin address with us.
Have a great week, and until next time...happy reading!


6

Tally it up for Main Idea

Hi everyone! It's Melissa from Don't Let the Teacher Stay Up Late here to share with you again! I don't know about you, but we just got back from Spring Break yesterday and are in full gear preparing for our state tests. This is where our upper grade teachers really start to panic, and the kids can unfortunately become overloaded with test prep and stress from all sides.

Funny Birthday Ecard: If I sprout horns and blow hot steam out of my nostrils, don't be alarmed... State testing has begun. I will return to my normal self in approximately two weeks.

Well, I am sharing a "test prep" tip, but it's one that I think is very simple and can really help your kids a ton! Virginia actually did an analysis of the most missed questions on our state tests, and, no big surprise, Main Idea and Supporting Details appeared a lot.

Many of our teachers have taught the students to "Stop and Jot" or make "Headlines" for each paragraph, which can be effective but also frustrating. I've been working with the students to keep it short and simple if they do it so they don't burn out from writing these long sentences every time. Plus I also teach them to chunk smaller paragraphs. Still, that's not the strategy I'm here to share.

When students reach a main idea question, have them use tally marks to see which choice is discussed most often.

I pulled a passage from ReadWorks, which is a great free site that I highly recommend if you're looking for engaging passages. Have the student read through it once on their own. Then when they reach any question that asks for the main idea or says the words "most", "mostly", or "main"...


The hardest part is getting the students to see relationships when it's not so specific. I would recommend modeling a LOT, then have them work with a partner or group before trying it independently unless you know the passage or question is a little more straightforward.

What other little "tricks" do you teach your kids to help prepare them for tests?


2

Reading Strategy File Folders!

Hello! It's Amy over from Eclectic Educating again! Today's post is just a  little explanation of one of my favorite activities from the amazing Debbie Miller. Is anyone else out there completely in awe of the wonderful Debbie Miller? I had the privilege of seeing her speak at a conference my first year teaching and loved every minute of her session. We studied her book Reading with Meaning: Teaching Comprehension in the Primary Grades in great detail in my college classes.


I really love how she gradually fosters independence in her students with the key reading strategies. My post today focuses on an idea found in her second book Teaching with Intention. The activity is very simple, but my students loved it!


The first thing you need is some file folders. (I thought purple added a little flair!) Using a permanent marker, I divided the file folder into four sections: 

              1. What we think we know
              2. New Learning
              3. Questions
              4. Misconceptions


After I finished labeling the different sections, I laminated all of the file folders, for durability. In her activity, Debbie Miller used full sized post-its, but I found that the mini post-its worked better for my students. 


This activity works well for most nonfiction texts. To begin, I have my students record what they think they know on post-its. We label it as what we think we know because sometimes students have misconceptions about a topic. If we find this to be the case, we simply move the post-it to the misconception section later on. 


Then, students write questions they have about the topic. We also pause throughout the reading to add more questions. When we are pausing, we also add information to the new learning section. As we go along, we move any post-its that turned out to be misconceptions. (Sorry for the glare!)


I found that this activity really got my students to focus on their own thinking during their reading. They also were really excited to use file folders and post-its. It's the simple things right? Some of my favorite texts to use for this activity are articles from Ranger Rick  magazine. 

Thanks for another hit Debbie Miller! Is anyone else out there a huge Debbie Miller fan? If not, who do you admire?


4

Reading Response Spinners

As a reading specialist, I’m always looking for ways to make reading intervention more fun. My kids need a lot of repetition with the same things, but in a motivating way!

There are a few story elements that I like to review after every fiction book we have read- and to make it more interesting, I picked up some supplies from the Dollar Tree and created some Reading Comprehension Spinners!

IMG_4446

On the blue pinwheel, I just used a Sharpie to write Main Idea, Main Character, Setting, Problem, Solution, and Author’s Purpose. I did have to write quickly because the Sharpie wanted to bleed through a bit. No big deal, though!

IMG_4399

While I was on a roll, I made two more spinners, too- one for reading responses (the green) and non-fiction (pink). I labeled them with washi tape.

IMG_4430

So, for a grand total of $3, I have 3 spinners! These would be great in the regular classroom, too, for quick review after a read-aloud!

IMG_4419

When I use them with students, I spin it and let them stick their finger in to stop it. If we’ve already stopped on that one, we turn to the next one that hasn’t been done.

The reading response one may be my favorite, because I can spin it once and have all of the kids respond to that prompt! How do you review common reading comprehension questions like story elements?

jennybuttontitle

14

Inferring Strategies


It is Jessica here, from Hanging Out in First, and I am so excited to be back with you today.  I have come to share with you some fun strategies that we have been discussing in our school reading committee.
http://www.hangingoutinfirst.blogspot.com/

Making inferences is one of the most difficult things to teach.  We so often receive questions on best approaches for getting kids to make inferences while reading.  Recently, I made this the focus of our reading committee meeting with my faculty.  Today I am here to share with you some of the many resources and strategies that we discovered!

First I will share with you this definition that I found:

I thought that this was an appropriate and simple definition for such a complex concept.

I am going to share with you some ways that you can teach inferring across all grade levels.  The first one is a great one for primary and something that you are probably already doing, and that is picture walks!

At my school we use the Superkids reading program in K/1 and Journeys in 2-5.  My first suggestion to my colleagues was to do picture walks with the weekly story before actually reading it. I have done this by scanning the book and removing the words or by simply using my smart document camera and covering the words so that the students can focus on the pictures.

One of my favorite books to use for inferring is called No Mirrors in my Nana's House, by Ysaye M. Barnwell.  
 

In this story, the characters in the images do not have any faces.  The whole story is about how there are no mirrors in Nana's house because it does not matter how you look, it only matters what kind of person you are. Therefore, the characters have no faces (no mirrors to see their faces).  This is one of my favorite ways to get students to infer, plus teach them an important life lesson.  It also is based on a wonderful, catchy song.  You can listen to the Nick Jr version on YouTube.

You can also give students just one picture (a photo, a picture from a magazine, a sales ad, an old calendar picture, etc) for making inferences.  For this activity, I like to glue the picture to the middle of a piece of chart paper.  Then I will put students into groups and have them brainstorm what is happening in the picture on the chart paper surrounding the picture.  Older students could even write a story using their picture!

Here is one of my favorite pictures to use for this activity (found on Pinterest).

You can also have students infer feelings.


I think that this is one of the most difficult concepts for my first graders.  Each time I ask them how a character feels, I get one of three answers: happy, sad, or mad.  It is so frustrating!  As a class, we created a list of feelings that people and characters may have.  After a bit of prompting, they finally got the hang of it and let me tell you how proud I am of some of the words they came up with!

We then wrote stories about times that we felt one of these particular feelings.  The most common stories were written about feeling special, loved, and invisible.  What amazing stories!  This has truly helped us with inferring how a character feels in a story.  I no longer get the answers happy, mad, and sad.  I get frustrated, annoyed, embarrassed, invisible, independent, proud....

Using riddles is another fun way to get students to infer.
Playing games like Who am I? and Headbandz is a great way to keep students engaged and thinking!

For more fun ways to get students inferring and for some wonderful resources, you can check out my entire power point here!


3