How to Make Your Kinders and Firsties Reading Rockstars with RTI


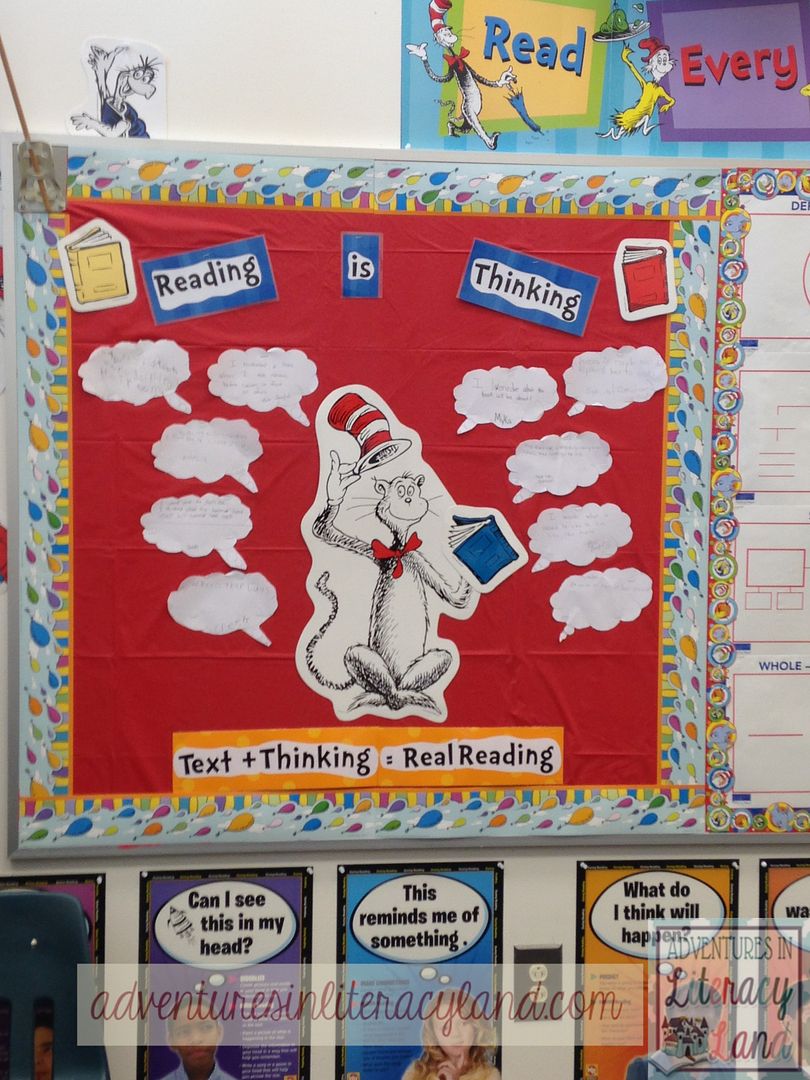
Do the very letters R-T-I have you freaking out?  Do your palms feel sweaty and is your heart racing? Well, you are probably not alone if this is the case, but I am hoping that your life in kindergarten and first grade will become just a little easier after I lay out a few RTI ideas for you. 

RTI can be a little overwhelming to navigate, but this post explains how to make it work for you and your students without losing your mind.

For our beginning readers (who are likely emergent at this point), there are several core skills to master, and here they are...
Letter Name Recognition 
(Upper and Lowercase)
Letter Sounds
Rhyme
Concept of Word
Sightword Recognition
and 
Word Building with Short Vowels
You may be thinking, "Yeah, that's great, but what do we do to make sure they know these?" Well, we start with identifying what they know, what's in progress, and what's unknown. You may be required to use an assessment from your division or maybe you've created one of your own. If not, the assessment set below would work well for your beginners. Parts of it may not be useful at this time of the year, but you may be able to use pieces of it as a probe for your students as they learn the skills or as part of your progress monitoring. This assessments includes all but the sightword recognition part, but I am going to direct you to a great website that has all you need for sightwords. The School Bell has been around a long time (at least 10 years I think).  [Here] is the link to the [Dolch Kit] which presents the Dolch words from highest frequency of use to lowest, activities and games for the word lists, assessment materials, and more.  


Once you've screened your students, you'll want to rank the results and identify who is lagging with each of the skills and target them. By ranking, you'll be able to form your groups. You'll want to focus the greatest amount of your time on your bottom quartile kids. If you have assistants who work with you regularly or parent volunteers who are able to tutor, charge them with the task of addressing these specific needs with your struggling student(s).  If you set it up in a gamelike format, your little people will enjoy this special attention which will also help you move them along the reading continuum. Of course, you too will want to focus on these skills in your guided reading time too.

Lesson Time
With your targeted students, you'll want to spend about twenty minutes (in 5 minute increments) to address letter names and sounds, rhyming, Concept of Word, sightwords, and writing during their guided reading time daily (tier1). With quick moving lessons, you will be surprised how much you can get done in these short snippets of time.  Activities you use could included the following:
  • Letter Names/Sounds-Magnetic letters, Name puzzles, Matching letter and picture with beginning sound, sorting fonts, matching upper and lowercase letters, I Spy   
  • Rhyme-Sorting pictures, Matching pictures that rhyme, poems, I Have. Who has?, Rhyme bingo, and word family work.
  • Concept of Word (COW)-nursery rhymes and simple four line poems, cutting apart sentences and putting them back together, highlighting the space between words, placing touch points below words. and lots of modeling.
  • Writing-draw and label, copying tasks, name writing, and framed sentences
  • Sightwords-use the COW time to focus on sightwords in context.  
If you are in need of go-to materials, I have developed three sections of a growing RTI kit.  So far, I've completed the Letter Names and Sounds Section, Rhyme Time, and the Concept of Word Bundle. Here's a preview of each:
 
The letter/sound kit includes 70 pages of lesson directions and activities, and the rhyming kit includes 58 pages.  All of the activities are set up to be fun and interactive for tutoring sessions or small group.

Includes 40+ poems that will last all year long
Scheduling
RTI is a team approach including the regular classroom teacher, paraprofessionals, reading specialists and special educators. The classroom teacher is responsible for tier 1 instruction (your core instruction).  This includes both whole and small group lessons within the classroom.  Tier 2 instruction is typically provided by an interventionist in a "push-in" or "pull-out" format, and for those still not progressing, tier 3 instruction is offered in a very small group of 1-3 students per teacher. Tier 3 instruction is best when it's provided by a certified teacher or specialist, but if this is not available, the classroom teacher may be asked to provide tutoring time. Schedules are best determined by the individual schools where the "big picture" includes available personnel, the daily routine, and numbers of students needing assistance.  [This powerpoint] is very well done and explains the scheduling process well. It is so important that there is team planning. Those not needing tier 2 or tier 3 instruction should be involved in enrichment activities during the enrichment/remediation block.
Progress Monitoring
Once you've got your routine established, the final step is to make sure you monitor your students' progress.  With tier 2 students, you will need to assess with an assessment every other week and with tier 3 students, you'll assess weekly. Once mastery is demonstrated, regroup or move to the next lagging skill. 
For more information...
There are many great blog posts on this topic out, so if you're looking for information for older readers or more on beginners, you might check out the following blogs and posts.  These ladies are much more knowledgeable on this topic than I.   

Button  Button  

As I mentioned, I am still learning too.  I hope that this helps give you a few ideas to work with to help your beginning readers.  

If you have a successful RTI program in place, it would be wonderful to hear more from you.  Please take a moment and share your experiences.


LISTEN UP...I'll make Listening Center one of your Favorite Centers

LISTEN UP...I'll make Listening Center one of your Favorite Centers
I don't know about you, but LISTENING CENTER used to be the bane of my existence.  Every week finding a new book…making sure it wasn’t too long…making sure the tape worked…making sure I had multiple copies…ugh.  Then, I finally figured it out:

I was making too many changes.

Teach Process, Change Product

LISTENING CENTER is another center that once the process is taught…you’re golden. 

For classroom set up purposes...we hang a sign where the students will work.  Every classroom is a little bit different, so I've had the listening center set up different ways.  Sometimes I have the tape player on the table where they will work.  The table also has a bucket with their listening center booklets.  Sometimes, there isn't a plug available...so I have the students lay on the floor and listen to the book, then go to the table with the booklets.  One year, I had my students keep their booklets with them in a file box they took to every center, every day.  Regardless, as long as you establish the place and keep it constant, it will be fine.

Setting a Purpose for Listening

The secret to loving the LISTENING CENTER?  I choose one book PER MONTH!  That’s right…just 1.  The students have 4 opportunities to hear the book, while the product for each week is different. Now, my LISTENING CENTER supports comprehension.  Each week we set a purpose for listening.

Week 1 – Students listen to the story.  

Then, write the title and the author on the cover of their LISTENING CENTER booklet (2 pages of manila paper, folded, and stapled).  At the beginning of the year, I write the title and author on sentence strips for the students to reference at the table.  Once I got a SmartBoard, I wrote the title and author on the SmartBoard for student reference.  Towards the middle of the year, I teach them to write the title using the books.

Week 2 – Students listen to the story.  

Students will write the main character names and either illustrate the characters or glue provided pictures from the story.  At the beginning of the year, we decide who the main characters are as a group and I write the names on sentence strips for reference at the center.  Later in the year, we discuss the characters orally, but they have to locate the names in the book.

Week 3 – Students listen to the story.  

Students will write about the setting in the story and write a phrase.  At the beginning of the year, we decide what the main setting is as a group and I write it on a sentence strip.  Once again, as the year goes on they have to locate the information in the book.

Week 4 – Students give their opinion.

Students listen to the story a final time and write a response to the story.  At the beginning of the year, I provide the sentence starter, “I like it when…”  As the year progresses they can choose, "I like it when..." or "I do not like it when..."  

Changing my LISTENING CENTER from a weekly book to a monthly book helped my students with reading comprehension.  My students could have book talks about the characters, setting, and events easily.


Helping Little Writers Develop Writing Stamina


Welcome to Literacy Land!  It's Lauren here today from Teacher Mom of 3 to talk about writing, specifically writing stamina.  If you use a Daily 5 model in your classroom, you most likely are working on reading stamina right now. Writing stamina is also something that students need to work on, especially at the beginning of the year.

 Students need large chunks of time throughout the day to write across the content areas.  For some of our students writing stamina can be even more difficult to develop than reading stamina. Throughout the years, I have had numerous students who had difficulty "draining their brain" of ideas to develop a topic. After writing a sentence or two, they would proclaim that they had nothing more to write.  I am sure that you can relate!  I have found some ideas that have been successful with my students over the years from grades kindergarten through eighth grade. And now, I am using these ideas with my little writer (third grade) that I homeschool!

Whether you use a workshop approach, a Daily 5 model, or another curricular framework,  the following ideas can help your writers (K-5) develop their craft and strengthen their writing "muscles".


1. Use Journals Instead of Worksheets

 Use journals as “morning work” in place of a worksheet or a DOL type of activity.  Have students apply and practice the concepts and teaching points from the previous day's mini-lesson instead of completing a worksheet.   Teachers have varying opinions of writing prompts, but I like to use them for developing writers.  I have found that using prompts that include fun and thoughtful topics encourage students to write.  Another perk with using prompts is that they provide scaffolding for the writers who are having difficulty selecting a topic.  Once or twice a week I give students a freewrite where they select their own topic.  This gives me another opportunity to observe, “kid watch” to see who is having trouble selecting a topic or maintaining their writing stamina.  At the beginning of the year, we brainstorm as a class possible writing topics. I record ideas on chart paper and we continue to add ideas on a weekly basis. The journal can also be used to “harvest” writing topics for Writer’s Workshop. Through modeling and practice, students will learn to start writing in their journal as part of the morning routine or at the beginning of your ELA block, for example.


2. Use a Timer

At the beginning of the year, I set a timer for each "formal" writing activity such as journal writing or during writing workshop, for example.  As a class, you can chart progress being made with writing stamina and students can monitor their own progress.  Are students drawing and writing the entire time?  Are they quietly working? Who has put their pencil down and is about to tell you, "I'm done"?  Praise students for any progress they have made and challenge them to beat the previous day's time. Click here for a free chart you can download from Teachers Pay Teachers

3. Quick Writes

I try to provide as many opportunities as possible for students to flex their "writing muscles" throughout the day in all content areas. Quick Writes can be used for so many different purposes. I like to use them for students to express in writing their reflective thoughts they have during a lesson.  For example, in the middle of a science lesson, I may have them list three things they have learned so far and one or more questions they have.  Or, I may have them define an important vocabulary word from math and show an example. 


4. Entrance and Exit Tickets

I have used these for over ten years and love them!  They allow for a quick formative assessment that you can use before or after a lesson.  There are many fancy templates available now, but I usually just use a sticky note or an index card.  Again, just another way for students to develop their writing muscles.


5. Reader Response

Use reader response in all content area reading for students to develop and demonstrate their understanding of the text as well as to show evidence of reading strategy use.  I also like to remind students that they not only read in all subject areas, but they also write in all content areas. Writing is a tool that we use many times a day, not just in language arts class!  Emphasize that they are to use and apply their writing strategies in all subjects.  Even now as a homeschool teacher, I have my third grader keep a reader's notebook.  The first part of the composition book is for the interactive notebook and the remainder is for reader response (for all content areas) and additional reading mini-lessons.


6. Writer's Notebook

I use the writer's notebook to house writing mini-lessons including interactive mini-lessons and for all stages of writer's workshop. The journal could be a part of this, but it will not fit in the composition notebooks we are using. However, the two notebooks are often used together, as the journal can often be used as the source for writing workshop topics.  Similar to the journal, I use the writer's notebook as the place to practice and apply what we are learning.  For example, we were reviewing a complete sentence a a week ago.  Instead of using a worksheet to practice identifying subjects and predicates, my son wrote a few sentences about the topic "summer" and then identified the subject and predicate for each sentence. Another example is I will have him return to a draft he wrote in his notebook to search for all the nouns, if that is the teaching point for the lesson.


7. Personal Dictionary/Portable Word Wall

One of the most difficult things to get across to my writers is that they do not have to worry about spelling correctly in a first draft. It's ok if not every word is spelled correctly. They are to stretch the sounds, make a good try, and circle the word if it doesn't look right. Then later, they can go back and correct spelling (the words they circled) during editing.  On the other hand, there are times when you only have one chance to work on a written piece before it is "published", either being turned in to the teacher or to a classmate.  In either case, the personal dictionary is a life saver for you as the teacher and for your writers.  Students keep the personal dictionary or portable word wall in their desks and can access them anytime they need to know how to spell a word.  This teaches them independence and can increase their writing stamina because they are stopping only briefly to check the spelling of a word.  During editing and/or conferencing, I will have students write the words they had difficulty spelling in their dictionary to consult during future writing.


8. Boost confidence!

This, this is the most important tip, in my opinion, for helping writers not only develop their stamina but to develop as a writer as a whole. Many times students don't write for very long because they do not have much confidence in themselves.  They may feel that they don't have "good" ideas or anything important to say.  We as their teacher (or as their mom, in my case!) know better!  From day one I refer to my students as writers, as authors with creative, important, and worthwhile ideas and pieces to write.  I tell them, YOU are writers!".  I do what it takes to nudge them toward risk-taking and to look at mistakes and "failures" as a opportunities for growth and as a learning experience.  This is one reason why I don't assign a grade to every piece of writing at every stage of the writing process.  I want to give meaningful and targeted feedback that students can use to become better writers.  

In addition, I share my experiences as a writer, as I write when they write.  I use mentor texts a lot, but I also find it meaningful to my students to read my writing, to see me struggle, and to watch me find what works for me.

There are many other great ideas that we as teachers can implement to help develop our students' writing stamina.  What works for you and your students?  Please share in comments.


Reading is Thinking!


Hello, all!  It's Andrea from Reading Toward the Stars with a little bit of thinking while reading for everyone!

At this point in the year, I spend a lot of time with my students working on thinking about what they are reading.  We do a lot of comprehension activities that include so many different hands on ways to get kids excited about reading.  We love using this thought bubble to show that we are thinking while we are reading.  You can read more about that on my blog in this {post}.

I read the book Ruby the Copycat to my third grade students, and they used it to tell us what they were thinking while I was reading.

In Ruby the Copycat, Ruby is the new girl in school.  She copies everything the girl in front of her does, resulting in a loss of friendship.  Then she copies her teacher, and her teacher makes it clear that she needs to be herself.

The next day they read books of their choice and wrote something they were thinking while they were reading.


 I love it because we filled up my "Reading is Thinking" bulletin board.  Here is what it looks like now that we have done some reading and thinking!

What fun it is to see what they were thinking while they were reading!  Some of them retold the story, while others told us something the characters could do to solve a problem.

I am linking this up with my own blog's Book Talk Thursday!  If you have good books to share, please feel free to link up anytime! It is open through much of November!


Reaching Readers with Online Books

Greetings from one long, lost blogger!

Hello!  It's me--Jennifer--from Stories and Songs in Second!


My summer hiatus from this royal kingdom of literacy lovers is now over! 

Know that I am glad to be back to share a wonderful website that I recently discovered!  I've used RAZ Kids, a program purchased by my school district, as my "go to" online reading resource for many years, but am going to add EPIC to my student's list of Daily 5 Listen to Reading choices this year!

I've been very impressed with the variety of literature choices provided at Epic--Books for Kids, and really like that many of the titles included in their different libraries are current, quality trade books.  There is a balance of fiction and non-fiction, and you can tailor your menu to your student's interests.


In order to show you how easy-peasy it is to sign-up for your account, I took a series of screen shots so that you'd have a picture tutorial!  I am not the most techno-savvy person, but was able to set up my account on my home laptop, and plan to access it on my iPads at school as well!  There is also an iPhone app!


I love the Scaredy Squirrel series, but don't own many hard copies.  I am looking forward to sharing more of the stories with my second graders using EPIC on my classroom SmartBoard!  I am also looking forward to sharing information with my students' families so that they can access our account at home and READ, READ, READ! 


I hope that you'll be able to use EPIC effectively this year to reach and teach more readers!  Click
{HERE} to get started!

In closing, I'd like to share this fun set of promotional posters I made for the annual literacy initiative in my building.  Maybe you can use them in your classroom or school as well?!?!   Click {HERE} to download it!  

The "We have read _____ picture books," "We have read ______ chapter books," and 
"Your teacher is reading...." posters were inspired by the ever-wise Pernille Ripp.   She writes over at Blogging Through the Fourth Dimension, and shares my love of picture books and fills her classroom with them.  I look forward to encouraging a classroom community of children who are passionate about books this year, and hope you will too!


As always, thank you for allowing me to share my story!  Continue to keep calm, teach on, and hold a song in your heart!  Feel free to visit me over at Stories and Songs in Second this week where there is a back-to-school celebration going on!


Educational Resources from the National Park Service

It's Jen from An Adventure in Literacy. I've spent the last three summers traveling coast to coast on cross country trips. One of the highlights of these trips is the opportunity to hit all of the national parks. Most people know about the amazing beauty and natural resources that national parks offer, but I'm here today to share some of the educational resources too.


The majority of national parks have bookstores in their visitor centers. In addition to park resources, most of them have an AMAZING selection of children's books. There are nonfiction books to learn more about the features and characteristics of the park. There are also fiction books related to the parks. I'm talking about quality children's literature.


Carlsbad Caverns even had a book display by the elevators highlighting a few books!


Some visitor centers will give you 15% off with a teacher id on some items. As with all teacher discounts it depends on the park and can change at any time, but it never hurts to flash that teacher id and just ask!

If you have children of your own they can take advantage of the free Junior Ranger program. The program is individualized for each park, but it usually requires some sort of learning activities specific to the park and a junior ranger patch. You can read more about the program here.

If you're not near the visitor center resources, the National Park Service also offers some great web based resources. There is a kids page as well as a teacher page where you can search for lessons and resources. You can also visit the websites for individual national parks for educational resources. Just click on "Learn About the Park" then "Education".


National Parks are America's largest classrooms. Be sure to take advantage of all of the educational resources they have to offer. Do you have a favorite park or park resource that you use for education? Leave us a comment. We'd love to check it out!


Using Student Names to Teach Early Readers

Using student names in books to teach letters, sounds, rhyme, and other reading skills.
Creating a love of reading can begin with student names.  Student names can be as unique as each student.  Even if they have a "common" name, they make it their own.  Use what they bring with them to make them stronger.
Using student names in books to teach letters, sounds, rhyme, and other reading skills.

Read a Book

Everyone has probably heard of Chrysanthemum, by Kevin Henkes.  It is such a quintessential kindergarten book.  Watching Chrysanthemum love her name, then fret over her name, then finally LOVE her name again with the help of the wonderful music teacher is heart-warming.  I read the book to students then send home their name in bubble letters for their first family project.  They'll send it back in a week later, decorated and unique.  I also love A my  name is Alice.  It's a fun play on beginning sounds. I love giving the students a fun oral activity with the sound chart:  _____ is on the ____.  They'll write silly sentences like:  Austin is on the apple.  It certainly brings the giggle. Finally, my favorite book about names is an oldie:  Just Only John. It's about a little boy named John who doesn't like his boring name so he takes a magic spell to get a new name. Of course, in the end he wants to be "just only John." It's the cutest story.
Using student names in books to teach letters, sounds, rhyme, and other reading skills.

Name Chart

Please, please, please have a name chart.  Make it with them.  I'm not a fan of putting names on the word wall...because some names aren't easily decodable.  You can add a picture, if you'd like.  I usually highlight the beginning letter.  Sometimes, I circle all the A names, B names, C names, and so on.  We use the name chart to find letters in the alphabet.  I can use the name chart to help decide who is going to write a letter during interactive writing.  I can also use the name chart to find similarities and differences.  We can also use the name chart in the Fab 5 Center.  They have to write 5 Friends Names on the provided paper.  Do it.Using student names in books to teach letters, sounds, rhyme, and other reading skills.

Anchor Charts

Use their names all over the room.  How many letters in your name?  What letters are in your name? How many syllables are in your name?  How many vowels?  Use their name!Using student names in books to teach letters, sounds, rhyme, and other reading skills.

Art, too.

After reading Ten Apples on Top, a wonderful counting book, have the students draw their picture and count apples for each letter of their name.  (I usually use small Ellison(c) cut-out apples.)  They have to count, write, spell, create, order...and it's all with their name.Using student names in books to teach letters, sounds, rhyme, and other reading skills.

Writing Sample Plus!

This is the formative assessment our students will complete the first week of school.  At first, it's a listening, gluing and ordering activity.  They'll get the write paper, a pink "I" square and a blue "am" square.  Students will be asked to find the square with the circle in it and put a circle of glue stick inside the square.  Then, they will put the pink "I" square on the spot.  Next, they will find the square with an "X" in it and put an "X" of glue stick inside the square.  Then, they will put the blue "am" square on the spot.  Finally, they will write their name (with a model) independently.  They will also be asked to draw a picture of themselves.Using student names in books to teach letters, sounds, rhyme, and other reading skills.

First Partner Activity

Students can have a name model in their hands and you'll direct them to find a friend who:

  • has 1 letter the same as their name.
  • has 2 letters the same as their name.
  • has the same number of letters as their name.
  • get creative!

And we've just begun.  Are their any name activities you'd like to share?

I hope you have a wonderful September..and celebrate their names.

The Pros and Cons of Computerized Reading Programs

Many school systems use computerized testing as part of reading incentives and comprehension monitoring. Today, I thought I'd share with you some of the pros and cons of using Accelerated Reader and other computerized testing programs for evaluating the comprehension of independent reading material. Certainly, this has been a topic of debate as many reading researchers look at it's effectiveness and like any program, it has been used positively by some and misused by some.