Using Learning Grids to Engage

Hello! It's Pixie Anne from Growing Little Learners here today to share some ideas with you about using Learning Grids in Literacy!


Learning Grids are not a new idea by any stretch of the imagination and I'm sure we all use them or have used them in our classrooms before in some way. I certainly have in the past, especially for math lessons but only once for literacy. When I think about that, it seems strange because that literacy lesson was always a success and I don't think I have ever stopped to think about all the reasons why! It was a lesson on arguments (balanced and persuasive) and the children had a 6x6 grid in pairs full of statements such as: space exploration is a waste of money, Our parents are our best teachers, Children should be allowed mobile phones in schools, Dogs make better pets than cats etc. Children rolled the dice to land on a statement and had to argue for or against it with their partner. I used in in different ways and it always resulted in some great writing!

The course I was on (OTI) challenged me to think of other ways I could use learning grids in my classroom to engage learners and I thought I would share with you five of the literacy ideas I have had so far...

1. Describe the Nouns

Graphics are from My Cute Graphics 
It so happened that we were doing a unit of work on poetry and we were thinking of more interesting ways to describe boring objects. Of course, I did have a whole range of real objects in the class for children to refer to as well but made a quick learning grid using lovely images from My Cute Graphics and gave the children a choice. They loved rolling the dice twice to find the picture on the grid they had to describe and ended up with some super sentences!


2. Comparative and Superlative Adjectives

I then thought I would try out a grid in my phonics lesson the next week. We have been working on comparative and superlative adjectives and the spelling rules for adding these suffixes. 


This would work as a scoot activity too but my class enjoyed working in pairs and talking through the spelling rule using it this way.


I've uploaded these so you can grab them as a freebie from my store!


3. Chocolate Facts

After half term (I have a lovely week off at the moment!) we are starting a non-fiction unit on explanation texts and will be focusing on chocolate! Our first lesson will be activating prior knowledge and thinking about what we already know. Instead of paired work during the main part of the lesson, I thought I would use this at the start or end of the lesson to share some new facts with the class. I plan to put it into a smart notebook and put boxes over each fact which can be revealed when children choose a square.


4. Roll a Story

I think I will have this out as a start of the day activity for pairs to work on. Hopefully, when they each roll a picture then can come up with a little story or link between the two images. I'm always after new ways to get more speaking, listening and collaboration into the day and I hope they will find this fun!
Graphics are from My Cute Graphics 
5. Book Talk

The lovely Em over at Curious Firsties posted an update about her book Face Off idea recently (go and check it out!). I loved this and plan to set up a display outside my classroom just like it! Seeing the display she made gave me an idea for a guided reading activity I might set up along the exact same lines. I have made a grid with some of the books we have shared this year and know quite well. I plan for children to roll the dice to find 2 books then talk about their favourite. This could be a written response if they are working on their own or another speaking and listening activity if working in pairs - justifying their choices and explaining clearly their favourite book. I'm really excited to try this activity - thanks for the inspiration Em!


I acknowledge I have gotten carried away with the Learning Grids but please don't worry that all my lessons are based around this one idea! I am using them fairly sparingly so the children are still excited and not bored by this one engagement strategy and am using plenty of others too!

I do think they are a fun way of adding a game element into learning, promoting collaboration and offering the children some choice. I've just shared 5 ideas I've had for literacy (the possibilities are endless and I've been using them in math too!). 
I would love to hear how you already use them in your classroom or how you might incorporate them into a lesson in the future! 

These dice I ordered do make all the difference though - lovely soft, silent dice! One of the best inventions ever?!


Thank for stopping by today - please do leave a comment to share your learning grid ideas!

Cross Checking: What it is and why your kids need it


Learning to read can be such a difficult task.  There are so many skills that are necessary, for a child to go from a non-reader to a reader.  Many children are fortunate enough to be read to at a young age.  These children are given the opportunity to experience books and enjoy them as a story.  Through this simple act, children learn that books tell a story and there are beautiful pictures to match.  Eventually, those same children will begin to pick up books on their own.  They will tell their own story according to the pictures that they see.  They are doing exactly what we, as adults, have modeled for them.  But they are still non-readers….

So how does a child go from reading the pictures of a story, to reading the words?  There are so many skills involved in this process that we could discuss it all day long.  Children need letter recognition, letter sounds, decoding, rhyming, phonemic awareness, concept of word, and the list goes on and on.   

Today, though, I am going to discuss one skill that many people often forget about.  It is one of those skills that seems to come naturally for some children and is very difficult for others.  It is one that we, as teachers, often forget to explicitly teach.  It is cross checking.

In my classroom, I use the Beanie Baby Decoding strategies to help many of my students remember these strategies they need for reading.  The first two strategies that I always teach to my non-readers are Lips the Fish and Eagle Eye.  These are the very basic beginnings of reading.  Lips the Fish reminds my students to get our lips ready to say the first sound in the word.  It gives them a starting point when reading the word.  Eagle Eye reminds students to look at the pictures to help them with unknown words.  I teach each of these skills explicitly and separate in my classroom.  Then, I go back and teach them together.  THAT is cross checking.

Cross checking is the ability of a student to use BOTH the picture on the page (or the meaning in the story for higher level readers) and the letters that create the word to determine the unknown word.  This means that child has to use both meaning AND visual cues while reading.  Most students have no problem doing one or the other, but combining them is a difficult task.

To teach this skill, I give my students several prompt cards that I designed specifically for teaching this strategy.  Each set has identical pictures, but with two different words that could describe that picture.  Often times, students will look at the picture and choose an obvious word for it without realizing that it could be something entirely different.

For example, this card has a fairly obvious word in it.  Students will look at this card and know that it is a picture of a horse and they will read “This is a horse.”

However, some stories may not use the word “horse.”  Some may use the word “pony.”  Students without the ability to cross check will look at this second card and read “This is a horse.”  They may not even notice that the word begins with the letter P rather than an H.


You will notice that I added our symbol for Lips the Fish and Eagle Eye to remind students that they need to use both strategies to determine what the sentence says!  

Here is another example:


 There are so many instances in stories in which this is such a necessary skill.  After I have taught this skill using these cards, it is time to try it in a book.  I then purposely choose a story or two in which they will have to use this skill to read the book accurately.  In a book, the picture cues are no longer there, so they may need to be reminded when they come across it the first couple of times.

As students become stronger readers, the pictures in the stories become fewer and fewer.  They also become more vague.  Students will no longer be able to use picture cues as often.  Instead, they will have to cross check by using meaning.  They will have to decide what word would not only match those letters, but would also make sense in the story.

If you would like a copy of the example cards that I have made, click here and check them out!

https://drive.google.com/file/d/0B2JG_UEUmfSqeFVQVTFYNVlGT3c/view?usp=sharing


Adding Multisensory Techniques

I think what makes someone a good teacher is the constant desire to learn and grow.  That is why we read, follow, and comment on blogs.  We are always looking for more ways to improve our craft, help our students, and grow as professionals.
Over the past few years, I have worked hard on my guided reading routine.  It has changed as I moved from classroom teacher to pull out Title I teacher to push in Title I teacher.  It has changed as my time allotment has increased or decreased.  It has changed as my kids have changed.


This year my guided reading routine changed again.  (You can read a full break down of my routine over at Curious Firsties.)  I saw some gaps in what I was doing; therefore, I attended some PD and completed some observations of the OG teacher in my building.  And what it came down to is that I wanted more multisensory teaching to be occurring.  But...it had to be efficient and effective because (as we all know) time is precious.

Here are a few multisensory techniques that I have included in my daily routine.  (I still have room to grow, but this is a start.)

When it came to sight words, I have always used flashcards and then we found those words in context.

Now I do a few different things:
First I introduce the word orally and visually with these sight word cards from Child1st.


Once the word has been introduced, we do a "mix and fix" with letter tiles.


As a student is "fixing" the word, the other students are finger spelling the word on the table.  Then they all write the word using a pen and a textured placemat.


These additions only take an extra 2 minutes to my group because of the way that I have them structured.  But they have made a BIG impact on my students.

I am testing out some other multisensory techniques (such as the power of scent for some vowel sounds) but I am not quite perfected these yet :)

What multisensory techniques do you include?


Wondering Aloud With Wordless Picture Books


Hello Royal Readers!

It is a quiet and reflective Jennifer from Stories and Songs in Second  here tonight to share a few ideas I've gleaned from the wise and innovative Tanny McGregor.  This post is shorter and more succinct than my usual, but writing it has helped remind me of the importance of talking less and listening more during my teaching.

About two months ago, my fellow Lit Land friends, Carla from Comprehension Connections and Em from Curious Firsties, recommended McGregor's creative, artifact-rich, anchor chart-driven, sensory-based thinking strategy lessons to me, and I have been reading her books with reverence ever since.

In Chapter 5 of Comprehension Connections: Bridges to Strategic Reading, McGregor reminds us that we must make our classrooms a safe place for children to be naturally curious.  That we must take the time to let them just wonder about stories and poems and songs.

That we must encourage them to turn and talk to each other, and carry on conversations that are full of questions about what they are going to read and experience, or what they have already read and experienced.  That we as teachers must stop doing all the asking, and encourage our students to formulate inquiries that begin with these words.....


  • How?
  • Where?
  • When?
  • Can?
  • Is?
  • Does?
  • Could?
  • Would?
  • Who?
  • Whose?
  • Did?
  • What?
  • If?


Tomorrow, as suggested by McGregor,  I will dig out rolls of adding machine tape from my supply cupboard, and use them as never-ending "question scrolls" for my students to write on before, during, and after I share two of Molly Idle's wonderful, whimsical, and wordless picture books, Flora and the Flamingo and Flora and the Penguin.


We will "talk back" to the pages as I turn them, not raising our hands to be called on, but just wondering and observing out loud about these two stories, where unlikely friendships are revealed through delightful illustrations hidden behind pull-down and peek-a-boo paper flaps .

We will use our own voices to describe, explain, add words,  and wonder out loud.  We will link what we already know to what we've learned with thinking stems like......
  • I wonder...
  • What if...
  • How could....
  • But why....
We will cover a giant "Q" drawn on chart paper with Post-it notes that we've filled with questions we have about the characters and events in each story.   We will honor the fact that questions help us do three important things as readers....
  • Before reading, they make us open our minds about the text and want to dig deeper.
  • During reading, they help us understand the text.
  • After reading, they keep us thinking about what we've read and help us connect it to our lives, other books we've read, or the world.
We might even set some of the questions we generate to music, in the form of a piggyback song! Maybe we will write lyrics about Flora and her friends, and set them to the familiar tunes of
This Old Man.  Maybe we will snap or clap or dance or twirl or skate (in sock feet on sheets of wax paper across the carpet) while we sing.  Maybe our original composition will look and sound something like this (as set to the tune of  I've Been Working On The Railroad.  It will most certainly make a joyful noise!

I wonder what Flora's thinking,
as she skates across the ice!
Do you think that Flora's thinking
that the penguin will be nice?

Will he be a better skater?
Do you think he will be her friend?
Can she even really help him?
How will the story end?


If any part of this post has resonated with you, plan to invest some time and energy into incorporating McGregor's ideas into your own reading lessons!  You will find more helpful ideas and photos {HERE}.

You will also find a wonderful collection of other wordless picture books that can be used as mentor texts for questioning lessons {HERE}.  An article that features interviews with Molly Idle, author of the Flora series, and stresses how wordless picture books empower young children, can be found {HERE}.

Enjoy!


Non-Fiction All About Books


Hi everyone!  It's Jennie from JD's Rockin' Readers!  I thought I would share with you today a little about what my class is working on during Writing Workshop!


This is my favorite time of year for writing with my first graders because we get into writing non-fiction (All About Books and How To Books).  The kids go CRAZY over writing non-fiction!  They honestly can't get enough!  

Before Christmas, we wrote an All About Reindeer book together as a class.  We did research together and learned about how to add different features to our books including a Table of Contents, Diagram, Glossary, and About the Author page.


Now, they are working at their own pace, writing All About Books.  They first started with topics that they knew a lot about without having to do research.  

I knew I wanted them to be able to write about a topic by doing some research too.  This is how it ended up working out best…

We have "computer" as one of our "specials" during the week.  We have a computer lab teacher that is working to teach them the basics with computers.  This is the first year we have had this and I think it is WONDERFUL!  When the kids went there this past week, they each got to do a little research of their own.

First, we decided to use the website Wild Kratts from PBS Kids.  The kids all went to this website- 


From here they could search for an animal that they wanted to learn more about.  I gave each student a recording sheet to write down different things that they have learned about their animal. Click on the picture if you would like a copy...


Once the student finds an animal, they can click different buttons that tell about the animal.  What I like about this website is that they can listen to facts as well as read them.


My students recorded the different things that they have learned and now they can write an All About Book about an animal that they just learned about!

I would love to hear about how you do Non-Fiction (informational writing) in classroom!


A Pretty Flower Craft

Happy Valentine's Day Literacy Land Friends!!
I'm Deniece from This Little Piggy Reads and today I'm going to share a unique little craft with you.
Our school is hosting a Sweetheart's Dance this year.  This is a Father-Daughter Dance (Uncles & Grandpa's welcome).  We didn't think we would have much turn out (from students or staff) if we held the dance on Valentine's Weekend, so we hold it the following week.  

Since it is a dressy occasion, the special events committee decided that we needed to have corsages for the little ladies.  Great idea!  But, how can we get them?  We called a few florists to see if they would donate any left over carnations but that didn't work out.  So, we scoured Pinterest & found a great idea...Tissue Paper Corsages!  

If your school doesn't have dances, you could use these for a Mother's Day Banquet or a Cinco De Mayo craft. If you've ever made Tissue Paper Balls...then you probably already know how to make these! 


Step 1: Lay out your Tissue Paper (5x7 or 7x9 - depending on your desired size).  You will need 1 layer of green and 2 or 3 layers of your choice of tissue paper color.  
Nothing needs to be perfect, in fact if you have rips on the edges it's fine because you'll cut them off.

Step 2: Begin a fan fold.

Step 3: Double-Knot a piece of yarn around the middle
(a little shorter than the length of your arm).  

Step 4: Cut the ends into points, like you would a hair ribbon. Then, fan out.  

Step 5: Now, you'll pull the layers apart.  Be gentle.  I would suggest pulling the green backward and then pulling each color forward.  When you're finished pulling each layer, you'll need to fluff the pieces make sure the yarn in the middle is covered.  
  
Step 6: Tie your corsage on and wait for the compliments!


Does your school have any dances or special occassions where you could use this craft? 


Center Survival! Three Keys to Success during Independent Centers

Center Survival! Three Keys to Success during Independent Centers

1.  What is your favorite time of the day?
2.  What is the most crucial time of the day for independent learning?
3.  What is the easiest part of your weekly lesson plans?
4.  What needs to be based on routine, routine, routine?

OK...by now you know the answer to all of these should be center time.  If it isn't, I hope to convince you to change your mind about centers.  If it is, I hope I can give you at least one new idea to think about and maybe even implement.

I cannot emphasize enough the key to centers is routine. From Day 1.  No excuses.

Set-Up and Classroom Management

This is so very important...your room has to lend itself to independence.  The more independence your child has, the better centers will be.  The set-up of your room and materials cannot be overlooked.  When teachers and I work together to make centers work in their rooms, we make sure center areas are clear.  Each center has a table or group of desks and a designated shelf.  To make sure everyone knows about the center areas, signs are hung from the ceiling.  These signs are universal in the room, as they will be on the shelves, the bucket for materials, and the center board for self-directed centers.  Students know where to get and return materials and where the center rotation takes them.

Center Expectations

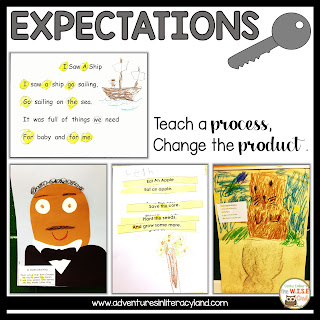
Expectations are key.  Students must need to know what is expected or they can't give it to you.  It's that simple.  Centers are NEVER the new skills.  If you want centers to be independent, they must be review skills.  If your lessons are the "I do, we do, you do" method...centers is without a doubt the "you do."  The best method for keeping sanity in the room and sanity in your plans:  CHANGE THE PRODUCT, NOT THE PROCESS.  If the ABC center is practicing rhymes, let them do it for several weeks in a row.  Change the rhymes, but let the exercise for rhymes be the same.  If the word wall word center is a "Read It, Write It" sheet, change the words on the paper, but the process is the same. My poetry center is always the same...just a different poem.  OH, and I forgot to mention, my poetry center and art center are ALWAYS the shared reading poem from the week before. They know it, they don't need help.

Center Self-Monitoring

Finally, students must be taught to self-monitor.  Part of this goes hand-in-hand with expectations.  Students will know what to do...you've covered that!  Students will know how to do it...you've covered that.  The last thing you need to do is let them know what to do when they are done. If you have a teacher assistant, students should be taught to raise their hands and get their work checked.  The TA will look over the work, decide if it's done, then tell them to "stamp it and put it away."  That's right.  Let them stamp their paper and let them file it.  They can do...it's part of their job.  If the student did not complete the assignment or if something needs to be fixed, the TA should ask them to check the example and fix the problem.  Don't get in the habit of telling them how to fix it, they need to do it.  If you don't have a TA during that time, then an additional step must be added.  Students should know to "get a book" or add a "fill activity" (something familiar to fill the time until you are done with a reading group).  You pull a reading group while they work.  When you are done with the group, you rotate and check and move to the next group as they move to the next center.

I could go on and on.  I can talk centers all day...but that's a good start.  Routine is the key!


Writing Letters in 2nd!

Hello! It's Tara from Looney's Literacy again! I'm so happy to be back and sharing how we've been practicing writing letters in second grade.

In this digital age, friendly letter writing is slowly becoming a lost art. I know that e-mails, texts and instant messaging have replaced most of my own letter writing. This kind of makes me sad. I think it's important to have this skill. Even if it is becoming obsolete it is still a form of writing that  kids should know. When I teach writing of any kind I always include mentor texts. This is important in stressing that reading and writing are reciprocal.  Some fun mentor texts for letter writing include:

The Jolly Postman or Other People's Letters is a sweet story of a postman who delivers mail to some very familiar storybook characters. Every other page is an envelope that contains each letter he delivers.  This is perfect for teaching different purposes for letter writing and how to address an envelope. 

Dear Mr. Blueberry is a great way one to share about friendly letters! Emily is very eager to share that she has a whale, in the pond in her yard,  with her teacher. Mr. Blueberry responds to her letters and lets her know that this is not possible but Emily continues to insist that there is until the end. 

Punctuation Takes a Vacation has several great opportunities to learn new things. It has a fun way of learning how punctuation works and gives examples of how postcards work. It's a win-win! 
With Valentine's Day right around the corner it's the perfect time to practice letter writing! 
I've put together this little treat to make your Valentine's Day sweet!